


After much frustration, research, multiple e-mails with our web-developer and numerous calls with Hubspot's helpful staff, I finally figured how to integrate one of Facebook's most useful social plugins into Hubspot - the comment box.
Facebook social plugins are widgets you can have on your blog that will allow you to use FB social tools like activity feed, send button, the comment box and a lot more.
The comment box lets your visitors to leave comments and engage on each of your post using their FB credentials. Now it's a lot easier to share you opinion on our posts instead of having to fill out a form (a huge turn off for many readers). Through my struggles of trying to figure this process out, I found that there's not a lot of clear resources to guide other Hubspot bloggers through the implementation of this very useful tool.
Create a Facebook APP
In order to use any of FB's social plug in features you have to create a FB app for your blog. You need this in order to obtain your App ID, which is will personalize your SDK code. This will also help you manage all of your social plugins on your blog. This has to be done through a personal FB account. It cannot be done through the FB page dashboard.

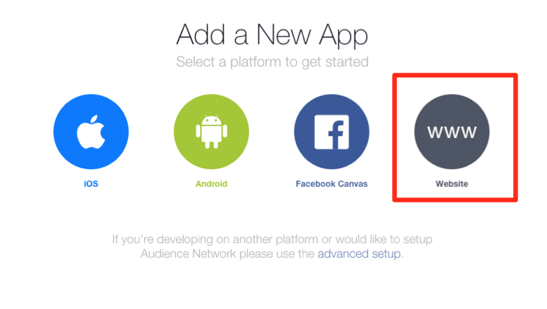
After you click "Add a New App", you will be prompted with another option. This app is going to be used through a website URL and not a mobile app.
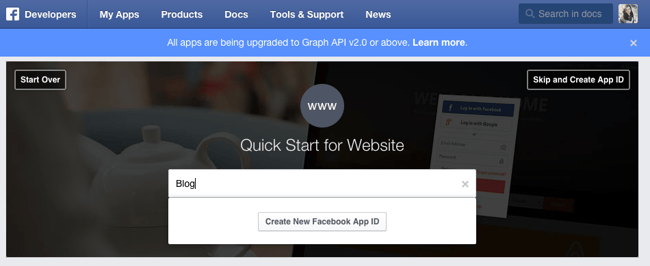
You will be prompted to create a new name for your app. After you type out your app name, click "Create New Facebook App ID"
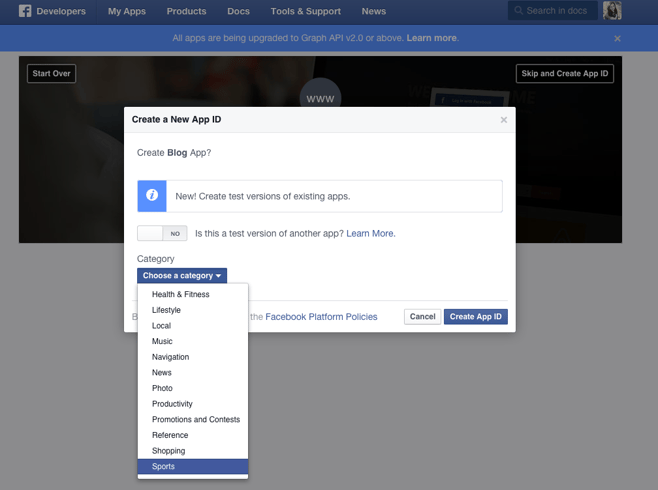
If you already have an existing app you will be asked if this is a test version of another app. If this is your first app then it should just ask you for the category of your app.
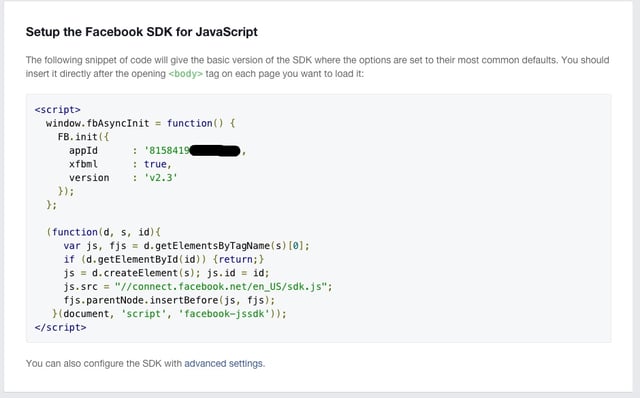
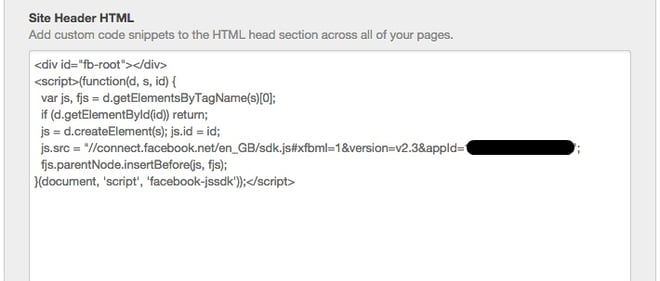
After you hit "Create App ID" you'll get the first part of your SDK code. The Facebook SDK for JavaScript doesn't have any standalone files that need to be downloaded or installed, instead you just need to include a short piece of regular JavaScript in your HTML that will load the SDK into all of your pages. We're going to call this code #1 and we'll come back to it.
Comment Box Code Generator
Now we need code #2 for the actual comment box. On the Facebook Comment Plugin page there is a comment box code generator. Enter in the URL for your blog and enter "100%" under "Width" to get a fluid width. Hit "Get Code"
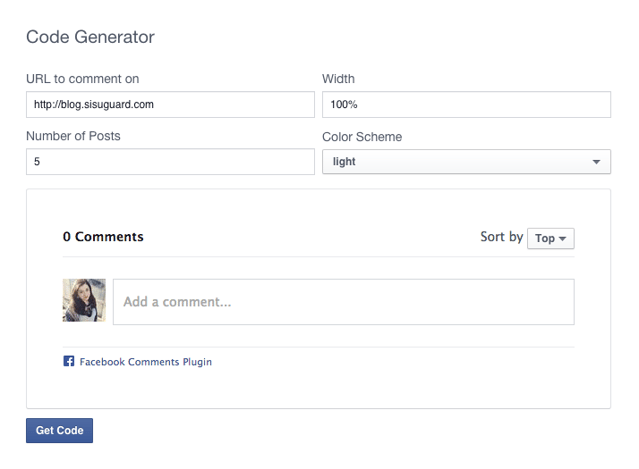
The following code should appear at the bottom of your pop-out window. This is our code #2.
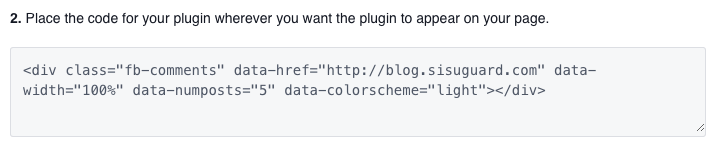
Code Placement
Copy code #1 to your clipboard then head over to Hubspot. Under the content tab, go to "Content Settings". Scroll down to the "Site Header HTML" and paste your code at the top of the box.

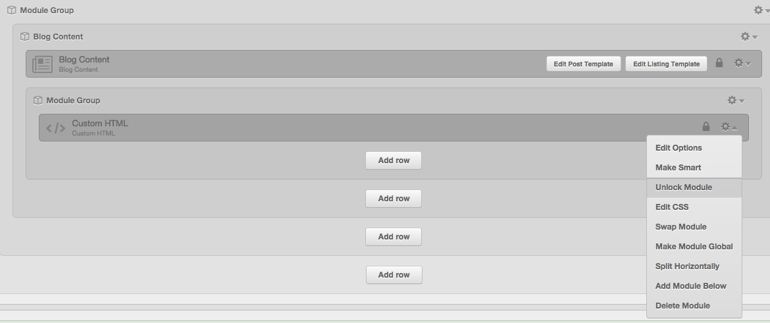
Now it's time for code #2 placement. In hubspot, under content go to "Blog". On the left hand side click on "Manage Blog Template". Depending on how your blog layout is set up, I doubt this part will look like mine. Create a new module by clicking "Add Row". Click on the small gear icon on the right of the module then click "Swap Module". The following menu should pop up:
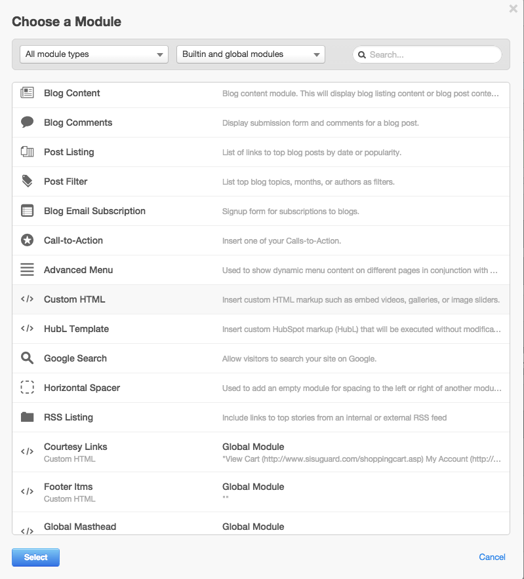
Select the "Custom HTML" module. Click on the gear again and click "Edit Options", you'll be promted by a blank HTML box. Paste code #2 here and hit "Done" (you can edit the name of your module here too). Click on the gear again and select "Unlock Module". Unlocking the module will allow you to edit the code for every post. Otherwise it will post the same comment on every single post.
Now you're ready to blog with the new comment box! Head to the blog editor and copy the URL of your blog post to your clipboard.

Scroll down to the bottom of the blog editor and *WALLA* look who's here...it's code #2! Paste the rest of your URL after the ".com/" of your blog URL.

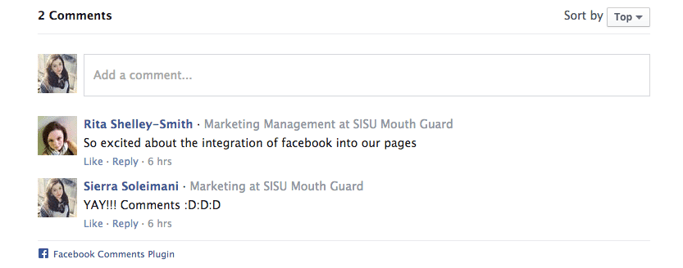
After you've pubished your changes, you should have a comment box that looks like this:
Test It Out!
One thing to look out for the that your comment box doesn't leave the same comment on every page. Test this out by leaving a comment on one of your blog posts that you've already configured. Then open up a different blog post. As long as your comment only showed up on the first post, you're good! Now you're all set to use the plugin! This will not only expand the reach of your blog posts but also create active engagement. If you have any questions, feel free to comment below!